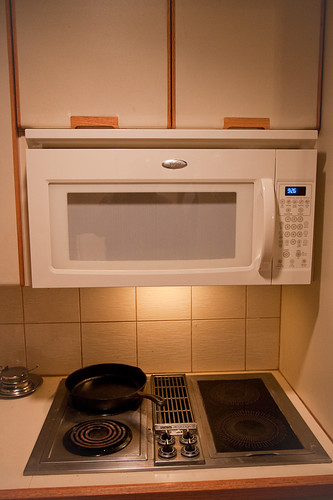
I had to replace my dead twelve-year old under-the-counter microwave (model Whirlpool) that had been installed when I moved in. I naively thought that if I could find a model with the identical dimensions and identical mounting hardware, then replacement would be fairly easy, a job I could do myself.
A search on the web revealed my assumption to be dubious. While the 30 inch wide, 16 inch high space for the microwave is supposed to standard, all the Whirlpools showed a dimension of 17 something. When I went to Lowes, however, the salesman there said, no, no they are all 16 inch, don't trust the manual. Well, Lowes did itself out of a nice healthy installation fee! because based on the salesman's assurances, I decided to not pay for the hefty installation that Lowes' charges (almost worth a microwave in itself!), and to try to do it myself.
If you've read "Zen and Art of Motorcycle Maintenance", there is the notion of gumption. You should try handyman's work only when your gumption is high. The trick is to have a functioning kitchen during the periods gumption is low, and the work is temporarily abandoned half-done.
The first part was getting the right color and model of machine, and that took a week. Then while the package was not very heavy, it was packed with a lot of padding and was bulky and difficult to handle. Mentally rehearsed moves before actually moving the item made that a snap.
Then the next part was gathering the steam to do the install. Work schedule, garden stuff and so on made for a delay of almost two weeks.
The instructions say, two persons are necessary to remove or lift the microwave into position. That can't be true, because the store would send only one installer. And it isn't true. First, unpacked, the microwave is much more manageable. Second, a small stool, a telephone directory and a set of kitchen chopping boards turns out to be more than adequate to position the microwave for removal or installation. (The telephone directory is essential because you need some "give" in the support). You basically first position the stool (stool is standing on the countertop) then put the microwave on it. Lifting the microwave with one arm, you slide the necessary extra supports one by one.
The real problem was the hardware. The store guy was wrong, this was really 17+ inches. Moreover the plate that goes against the back wall has entirely changed in the last 12 years. That had to be deinstalled and replaced with the new much smaller plate. The old plate covered the entire back of the microwave. The new is simply a strip at the bottom. The old plate had 8 supports - four screws into studs and four drywall supports. The new one has four - two bolts into studs and two drywall supports. Anyway, the installation there is essentially on a flat surface, so with reasonable care, it is a finite job.
Then there are the two bolts that fasten the microwave at the top to the cabinet above it. My first calculation was that an existing hole and a new hole would do. The new hole I drilled after what I thought were reasonable measurements. Disaster! (not really, it just felt that way). The bolts were way off. The problem is that looking from the bottom, the cabinet surface is not flat, there are all kinds of wooden reapers going this way and that.
Ultimately, the solution was, hoist the microwave into final position. Mark on it the edge of the cabinet. Mark the cabinet with key positions on the microwave. Go to Home Depot and get a right-angle (very important, relying on the edge of your ruler for a right angle can be fatal), and a contour gauge. (Cute tool, a contour gauge. Think of a tightly packed comb of moveable parallel pins. You press it against a surface and pins slide to conform to the surface.) Measure in every which way the position of the bolt receptacles on the microwave - from the centerline, from the edges, from each other. Make measurements and markings every which way on the cabinet. Measure five times to verify. Make a prayer. Drill holes. Install.
Yay! it worked! Took half of Saturday and half of Sunday! (remember the gumption thing?) The exhilaration comes from having done it entirely solo!
Now to put all the tools away.....
PS: the completed installation -

3 comments:
No photos of the project?
Well, none taken during the project. Completed project photo added. :)
I too believe that if I may do something I shouldn´t hire someone to do it for me. When I first move into my current apartment for rent in buenos aires I had to paint the walls and install the oven, and it was hard but when I finished I felt great!!
Post a Comment