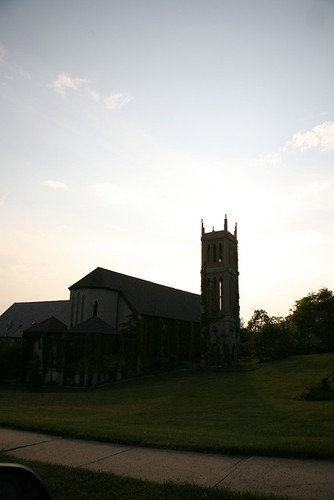
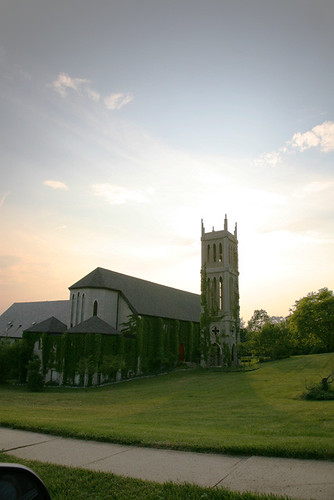
On Washington Valley Road, in the vicinity of Gabriel's Fountain, we came across this church. In the pictures below, the sun is setting and is just below the top of the tower. Taken from the car window, so that should explain the artifact on the lower left. BTW, I don't think the streaks in the sky are lens flare, as I recall, the sky did look like that.
In this first, the exposure was governed by the bright sky, and this is how it came out of the camera.

It was possible by a simple manipulation of the luminance curve in Photoshop to render it thus:

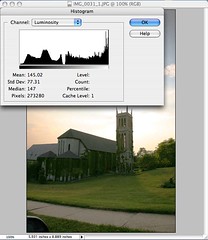
A look at the histograms before and after is illuminating. The exposure has enough information retained to make a substantial improvement possible.
Before:

After:

It is a matter of shrinking all the unused range of luminance.
Here's another shot, this time the exposure is governed by the foreground and the sky is blown out.

You'll have to take my word for it, but nothing I tried could restore any detail in the sky. The luminance histogram tells us why - the luminance information has been mostly lost.

The exposure should be such as to maximize the information captured, in this case the camera should expose the brightest area correctly.
(Tools used - Photoshop Elements 2.0 on MacOS X, and Photoshop 3.0.5 in MacOS 9 (Classic)).
9 comments:
This scene has a high dynamic range. The only way to expose correctly for both the bright sky in the upper portion of the frame and the darker foreground in the lower portion is by using a graduated neutral density filter. Of course, if you had the tripod and Photoshop CS3 things are easier now: you simply take a series of shots, first expose correctly for the sky, then for the foreground, and use the HDR (High Dynamic Range) Merge utility in CS3.
Also - by opening up the shadows as you have done, the downside is that you would have opened up the shadow noise (which should be visible at full size).
Regarding the last, yes, the shadow noise is visible at full size. Thus depending on the ultimate use of the image, one will have to choose one's method of exposure.
I suppose I should be able, by feeding image as exposed and with shadows opened, to Noiseware or Noise Ninja, quantify the noise increase?
Secondly, it seems to me that (low) noise and high dynamic range in the sensor are orthogonal properties. I.e., if I had a noiseless sensor with exactly the same dynamic range of the 5D sensor, I'd get away in all circumstances with what I just did.
The sensor provides a map of the scene; if I am able to invert the map in essential details, I'm good. Noise, out-of-focus light (because I have only amplitude and not phase information) are non-invertible.
In digital capture, the recommended strategy is "expose to the right" since the brightest tones are represented by the most bits, whereas the shadows contain fewer bits to work with. You need to slightly overexpose but have to be careful to not blow out the highlights in so doing. The goal in post-processing is to be able to move the exposure slider DOWN (as opposed to UP like you did - because that also ups the noise).
Noise Ninja and Noiseware should be the third line of defence (second line is, shoot RAW). Even at high ISO if you expose correctly the noise reduction filters have less work to do (read they will preserve more detail).
For more on the "expose to the right" strategy see -
http://www.luminous-landscape.com/tutorials/expose-right.shtml
http://www.visual-vacations.com/Photography/exposure_metering_strategies.htm
Also, bookmark this site -
http://www.cambridgeincolour.com/tutorials.htm
While CMOS are linear devices, is the quantization linear? Precisely the argument in the Luminous Landscape inverted - a linear quantization throws away too much information.
No, the quantizatioin is not linear. The linear RAW capture is encoded in gamma space (I haven't read up on the details of how this gamma-encoded curve is calculated, but it should be available via a Google search).
What a lovely snapshot of a church. Although I'm pretty much devoid of religion, I still appreciate the beauty of many religious structures. And I find Episcopal churches - by and large - the most beautiful churches in the Bible-belt! Now don't get me wrong, I truly respect your goal to capture maximum information. But if I had a choice, I'd prefer the information to be max in quality, instead of max in quanity...
The digital camera sensor has a rather different response to light than the eye. Thus whether in-camera or post-camera, processing has to be done to get the "real" image. It is this final product that counts.
Since the PC can use much more sophisticated algorithms than the processors onboard the camera, the correct division of labor is - camera collects information, PC processes it.
good to know... we've been taking photos in Rome all afternoon yesterday, and I've been wondering if Photoshop will come up with a 'tourist eraser' at some point. imagine that: you take a photo of the colosseum, click on a button and all the Japanese guys are gone. On the other hand I have to say, where photography made drawing or painting obsolete, painting definitely has the advantage that you chose your shadows/colors and can focus on the essential parts more easily. Best,
B.
Bee, I had a hearty laugh at that. But who knows? The camera makers now advertises face-recognition technology in its cameras (i.e., the camera figures out that there are people in the frame and attempts to optimize the exposure of the face). E.g., Sony,
So tourist recognition and elimination cannot be far off. :)
Post a Comment